
The stairs undergo a lot of abuse on a daily basis, surprisingly many people don’t know how frequently the staircase is used on daily basis, and over time this may cause the stairs to become creaky.
If you find yourself living with a creaky staircase, you will appreciate how irritating it can be when you walk and up down on them especially early in the morning or late at night.
However, fixing creaky stairs doesn’t always require a repairman or getting a new staircase setup. There are simple and quick solutions out there that don’t require much knowledge or skills to do.
Some of the easiest ways to get rid of the creaky noise from your stairs are; screw up the treads, add more nails into the riser, make use of quadrant molding, use sealant, and fix loose wedges.
In this article, we’ll talk about this deal and a few other approaches to help you get rid of the creaky noise in stairs.
Effective Tips to Help Your Stop Wooden Stairs from Creaking
1). Know Your Staircase
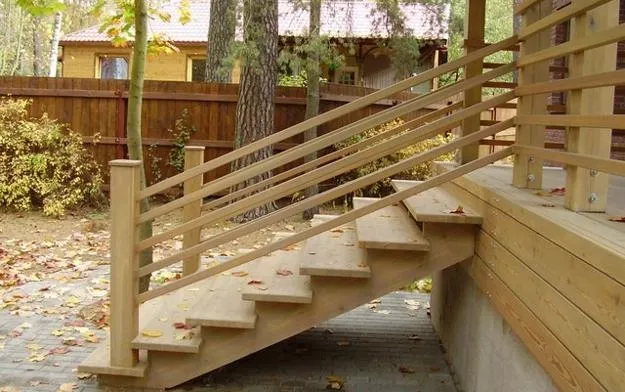
Usually, the stairs are supposed to consist of three main parts; the risers, treads, and stringers. The tread is the horizontal piece of wood that you normally step on. The riser is the vertical piece of wood that rises above from the back of each tread. The stringers are the frames that treads and risers hinge on.
You should expect your staircase to have about three stringers—one on every side of your staircases. And an additional one running over the middle.
A very broad staircase may have more stringers for additional support.
2). Locate the Squeaky Area
Slowly walk up and down your stairs by stepping on the edges of them, from back to front and sideways. Try to determine where the noise is coming from and keep an eye out for gap gaps that grow between stairs parts. These gaps allow the stairs to become loose and rub against the nails, screws, or each other. When this happens it induces the creaky you hear anytime you step on your stairs.
The squeaking noise can be coming from the back, the front, or the side of the tread. However, creaks from the back or side of the treads may indicate loose stringers while creaks from the front might mean loose risers. Knowing this will help you pinpoint the exact area the squeaky noise is coming from.
3). Dampen Squeaky Spots with Lubricant
One of the simple ways to cut down the creaking noise from the back or sides of your tread is to fill the cracks between the tread and riser with a lubricant like powdered graphite or talcum powder. When trying to lubricate the creaky areas, ensure not to use oil-based products which can buckle the wood and become sticky with dust and make the surface of the tread slippery if overused.
Wedge a piece of paper against the back of your tread and pour out a considerable amount of the powder onto the paper over the entire width of your staircase.
Then use your finger or distorted piece of cloth to work up the power in the best way possible into the cracks between the tread and your riser. Even though this approach may not prevent the two pieces of wood from rubbing against each other but it will significantly reduce the friction and stop the creaky noise.
4). Screw Up the Treads
Any stairs that creak in the front need to be tightened with fitted screws between the tread and the riser. To do this you just need a few screws to get going.
First off, drill about three equally spaced pilots throughout the front tread at the point it lines up with the riser. Then drill about three screws below the surface of the tread and ensure they sink a little bit.
Once you’re done use a colorful wood filler to cover up the screws and the little indentations. This will help prevent the sticking screws from hurting anyone that walks up and down the stairs barefooted.
5). Add More Nails into the Riser
Just like screwing down the tread, nails can also help you fix your creaky staircase and even render a more permanent solution than dry lubricant. So try out this approach if the first method isn’t enough.
Just like the screw method, create about two small pilot holes on the side close to the wall. Make the holes separated from each other about two inches apart. Then drive the nails into the holes at a 45-degree angle, this will make aim farther away from each other.
In the course of doing this also lookout and nail down any loose tread hard into the stringers at a 45° angle.
This will not only help tighten up the tread to the stringer but will also create a clamp that will prevent the nails from getting out of the setup in the long run.
Once you’re done ensure the nails do not poke out on the surface of the wood where it can hurt anyone that walks up and down the stairs barefooted.
Similar Read:
Ways to reduce subwoofer vibration through walls
Use a hammer on the poked-out nails as a few more taps will flatten them. You can also cover up the repaired places with dabs of wood filler or putty to conceal the nails.
6). Use Sealant
One of the easiest ways to get rid of the creaky noise in your stars is to apply thin beads of sealant below the step nosing, to help cushion the joints at the point the tread meets with the riser.
Next, wear rubber gloves and use your hand or run a plastic spoon alongside the applied areas to remove the excess sealant and push them into the squeaky joints. Clean the excess sealant by following the instructions on the packer before it dries.
You can also apply the sealant or polyurethane filler on the underside joint of your stairs.
7). Make Use of Quadrant Moulding
If you realize the creaky noise from your stairs is caused by a loose tread or riser, then you need to put glue on a quadrant molding to fix the issue. A quadrant glue is a long piece of wood that you can glue and attach at the bottom, top of the riser, or both. To achieve better results you can pin up the molding to both the tread and the riser for more adhesion.
In most cases, this approach is more aesthetically pleasing compared to the screws or nails. But you can consider adding quadrant molding to all the treads if you have carpeted stairs.
8). Inspect Creaky Stairs from Beneath
Not many people have the convenience of having access to the area beneath their stairs setup. However, for those who have constant access to it, it makes taking care of creaks and making their staircase sturdier and more attainable.
To fix the creaky areas underneath your stairs, all you need to do is to use three triangular wooden wedges also known as glue blocks on each creaky step.
You can easily get the glue block at your local home improvement store. You can make them on your own if you don’t find them at the local home improvement store. To do this you need to get a two-inch wooden cube and cut it into two equal triangular pieces.
Next, put wood glue on the two short sides of each glue block and tightly press the blocks into the right angle made by the meeting point of the riser and the tread.
Place one block at the center of the step and position the two blocks at the opposite sides of the step. Ensure to wiggle the glue block a little bit as you place it beneath the stairs to thrust out any air bubbles.
9). Dampen the Noise with a Carpet or Rug
If the creaky noise from your stairs is very faint and not of more concern, then the best way to remedy this problem is to use a rug or carpet to deaden the noise.
However, this will depend on whether or not people like the look of carpet on their stairs. But there is a way you get everything placed in the right way.
Other people may consider the idea of having a carpet on their stairs while others may want to go for different options. Generally, carpet tends slightly to be slippery which could create problems but they are usually silent.
10). Fix Loose Wedges
In most instances, staircases have timber wedges or shims beneath which keep the treads and risers securely in the stringers. Over time this shims’ work may become loose and cause the steps to flex. When this happens your steps will make a creak noise as you walk up and down them.
To fix the loose wedges or shims issues slightly squash a considerable amount of the PVA adhesive onto the tip and trap it back in place.
Conclusion
Many people will agree to the fact that creaky stairs can be very irritating. Dealing with weird noise from your staircase can be of much concern to those who want a quiet and peaceful home. However, this problem may grow bigger if these red flags are ignored.
Luckily enough we have discussed some of the best methods in this article to help you fix the creaky noise from your stairs. Read the article clearly and stick to procedures to help you achieve better results.

- How to Chew Quietly While Eating-Effective Tips - April 14, 2023
- Why is My Clutch Pedal Squeaking – Causes & Fixes - April 14, 2023
- Propane Tank Making Hissing Noise (Solved) - February 25, 2023